Ingredients
Scale
- 1 box of ready-made brownie treats
- 1/2 cup of ready-made chocolate frosting
- Candy eyes for decorating
- Black Food Writer
- 1/2 cup powdered sugar
- 1 tbsp water
- 10 drops of black food coloring
Instructions
- Line a baking sheet with parchment paper and place a cooling rack on top. This is going to help with the excessive chocolate drip and will make it easier to move the brownies to a plate afterward.
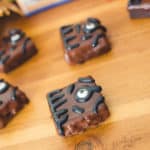
- Take your candy eyes and draw the creeping spellbook eye
- Remove the brownies from the packaging and cut them in half, so they are square sized.
- Take 1/2 cup of the chocolate frosting and melt it down. You want to make it easy to dip the brownies in and when they dry it’ll be nice and smooth. We don’t have a microwave, so I melted my chocolate stove-top, stirring constantly, so it wouldn’t burn. If you do have a microwave, place the 1/2 cup in a microwave-proof bowl and melt at 30-second intervals, until it’s melted.
- Dip the brownies in the frosting. Be careful, the frosting will be hot, so use a fork to get the brownie covered and let the excess chocolate dip into the bowl.
- Place on the cooling rack.
- While the frosting is still soft, add the eye.
- Place your baking sheet in the freezer for 20 minutes, to help harden the frosting.
- For Black Frosting: put 1/2 cup of powdered sugar in a bowl, add 1 tbsp of water and 10 drops of the black food colouring. You want the icing to be a bit on the thicker side, too thin and your black details will expand and drip off your brownie…trust me I learn the hard way. On the flip side, if this does happen to you, just after more powdered sugar 1/2 tbsp at a time to thicken it back up.
- Remove your brownies from the freezer and decorate. Once decorated, I kept them in the fridge until I was ready to serve them.
- Category: Dessert
